


.webp?width=200&height=75&name=blue-ridge-heating-air%20(1).webp)

Get Ready...
This is a quick how-to so you can crank up a Facebook ad campaign to drive traffic to your seasonal campaigns.
I know this appears long and complicated, but that's only because I'm spelling out every step in detail. This shouldn't take you more than ten or fifteen minutes to set up once you have the info listed below.
In addition to this article, we have a free, downloadable version you can print out and share with your marketing person. Click here to get a copy.
You’ll need a few things before you start.
Get Set...
If you've ever created a Facebook ad or done a boosted post, you already have a Facebook advertising account and dashboard. That's where this begins.
If you've never done a Facebook ad, click here to get started, Facebook Advertising, and follow these 5 simple steps to create your first Facebook pay-per-click campaign.

Facebook ads enable you to send people who click your ad to a variety of places based on what you are trying to accomplish.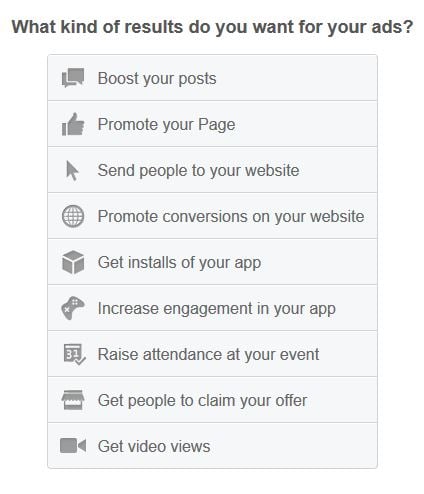 Since all of Mitsubishi’s promotion will be driving traffic to their landing page, and your company has been given a protected territory for this program, you can confidently drive traffic directly to the Mitsubishi landing page, http://www.philadelphiaductless.com/.
This will increase the number of website visitors directly from the zip codes where your prospects live.
If, on the other hand, you have a page on your website that showcases the Mitsubishi Ductless product and the rebate offer, you can just as easily send people there.
It’s totally your call.
Choose “Clicks to Website”.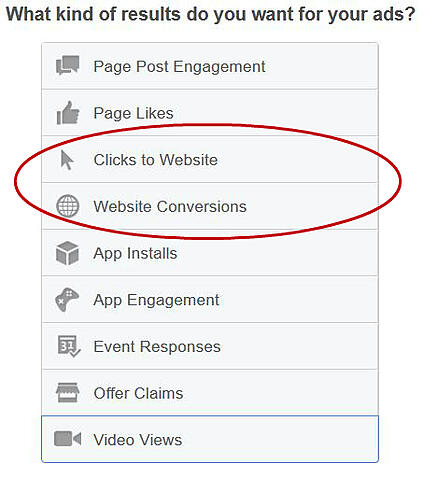
Your screen view will change to something like this.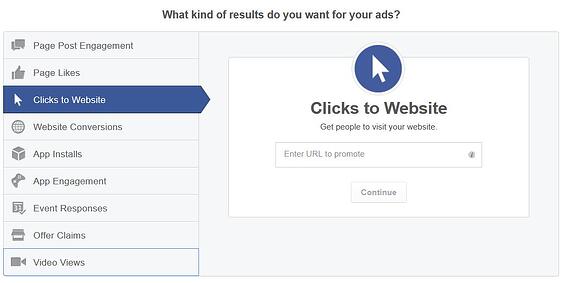
Enter the website address you want people to visit, then click “Continue.”
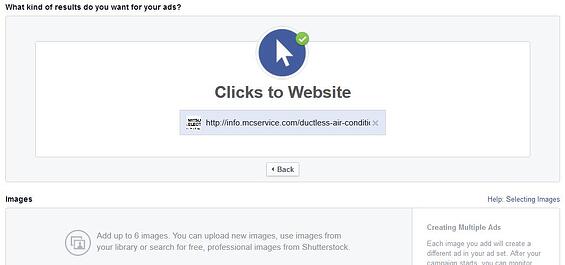
Facebook is going to automatically pull in some or all of the images from the target URL. Sometimes you might want to use these images, sometimes not, so click on the “X” in the upper right corner of the image to get rid of any you do not want to use.
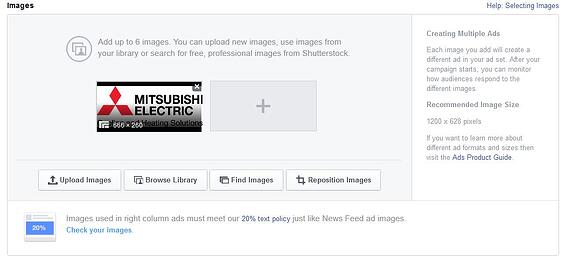
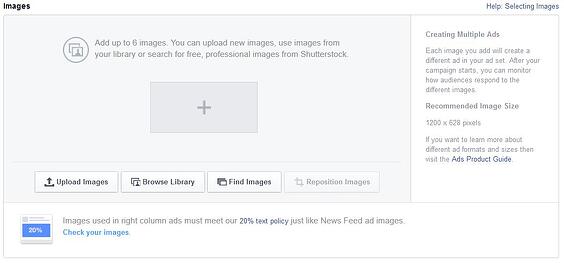
Click on the plus (+) sign to open your upload box.
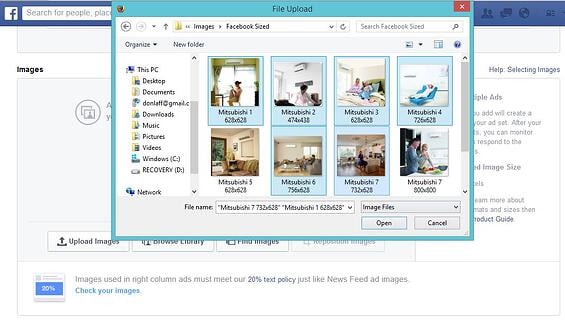
Select all the images at once by holding down your ctrl key and clicking on all the images you want to upload.
Clicking your ad will take people back to the website you enter, but the ad itself will be offered by your Facebook Page, so under "Connect Facebook Page", choose your business page.
Now you should be able to see your ad previews in the pane to the right.
Enter a catchy headline and some text which will be the messaging people will see in the sidebar view of your ad. Be sure to include a straightforward call to action like "Click here..."
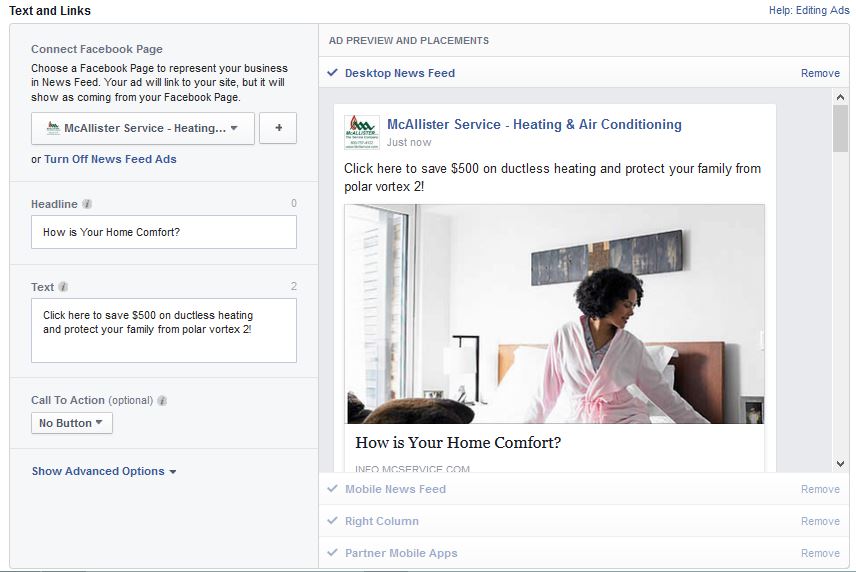
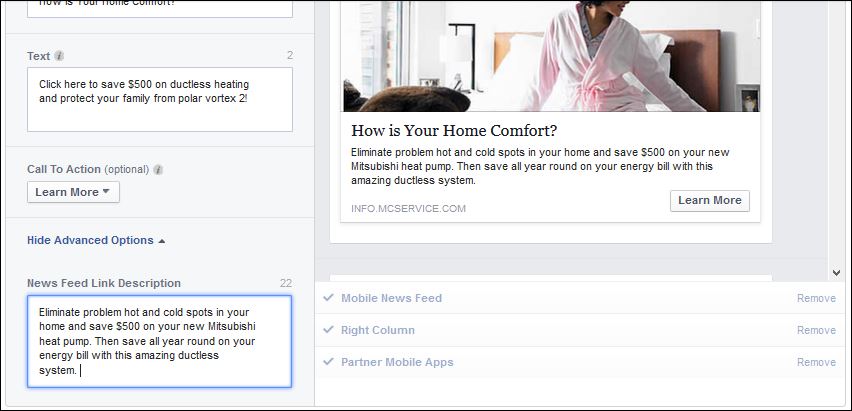
Then click on "Show Advanced Options" and a box will appear where you can really talk about the offer in detail.
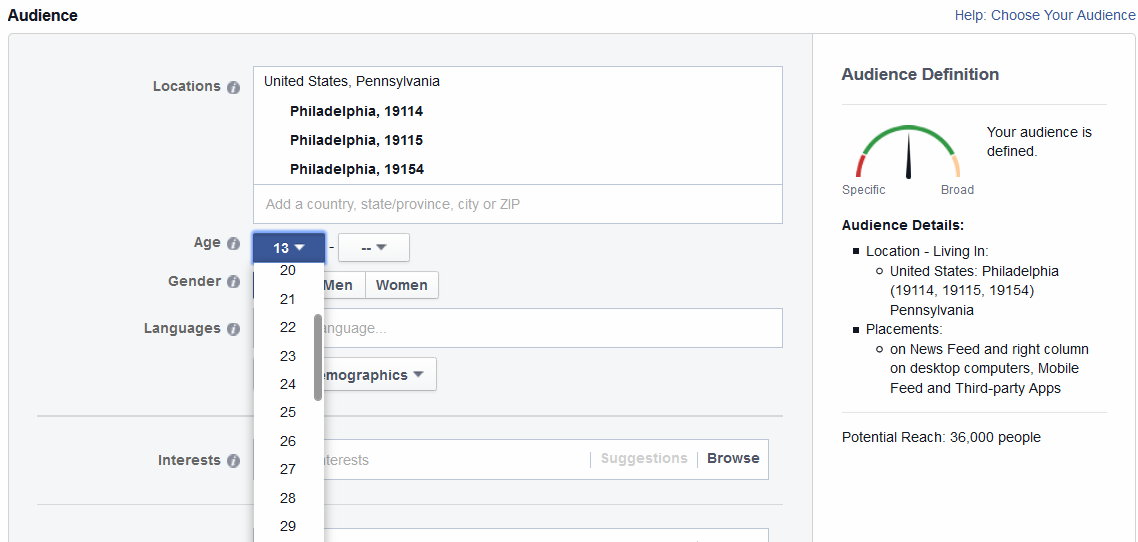
Start by entering the zip codes you want to target. Enter each zip code individually one after the other until you have them all in there.
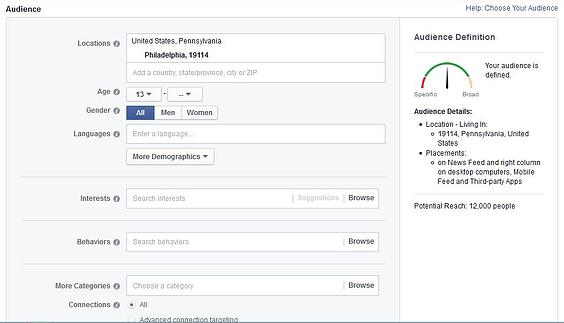
Then choose the range of ages of the people who you want to see your ads. You don't have to choose an upper limit, but you definitely want to ensure you're not advertising to kids.
There are more advanced targeting methods, but since this how-to is for a basic Facebook PPC campaign, I'm not going over any of the more advanced options here. If you want to know more about these advanced options, click here to schedule a quick call.
Click the link that says, "Change Campaign" and click the button, "Create a New Campaign". This enables you to create campaign names that are easy for you and your staff to identify when your ad dashboard begins to fill up with multiple campaigns.


You can also change the name of the ad set to be something easier to identify. Then you can choose the budget for your campaign, either a lifetime budget or daily budget.
In both cases, you are able to plan the amount you want to spend on the ads.
You can even choose start and end dates if you'd rather just set a daily budget and let the campaign run on autopilot.
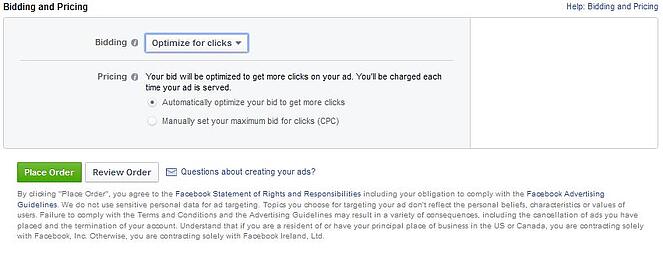
Not much to do here. Just be sure you're set to "Optimize for Clicks" and "Automatically optimize your bid to get more clicks".
Go!
That's it! All you need to do now is click the green, "Place Order" button and you're in business.
Facebook will send you approvals for each ad once they've had the chance to review the content. This usually happens within an hour, but during very busy periods, it can take as long as a few hours to for the ad to launch.
If you do not have the time or the inclination to do this, Comfort Media Group can do it for you for a flat rate of $350. Click the link below to set up a quick call and we'll let you know what we need to get started.


Comfort Media Group is the digital marketing company for growing HVAC contractors.
Tell us about your company and goals.
